Depuis quelques temps, je recherche et je teste des solutions pour mes applications web permettant de gérer les accès et les utilisateurs de manière centralisée et la plus modulaire possible. Dans ce premier billet, je teste LLDAP comme back-end d'authentification, Authelia comme IAM (Identity and Access Management) ,et permettant la mise en place du SSO, et Lufi comme application web.
Les 3 premiers critères indispensables pour choisir mes solutions sont comme d'habitude : libre, auto-hébergeable et gratuit (du moins dans le cas d'une utilisation personnelle pour ce dernier).
Le 4ème critère est la modularité. Certes les solutions tout en un sont plus faciles à installer. On peut citer notamment Yunohost ou encore Comos-cloud mais elles peuvent se révéler limitées suivant les besoins et leur évolution ou démesurées par rapport à un besoin précis. J'ai donc choisi d'utiliser plusieurs briques logicielles indépendantes.
Enfin le 5ème critère est de pouvoir mettre en place le SSO afin que les utilisateurs n'aient pas à s'authentifier plusieurs fois lorsque de nouvelles applications seront déployées.

Voici donc ma stack :
- LLDAP : Light LDAP est un serveur d'authentification léger qui fournit une interface LDAP simplifiée. Après avoir testé FreeIPA et Openldap (avec PhpLdapAdmin), je me suis arrêté sur cette solution pour sa facilité d'installation et de prise en main. Moins avancé que ses concurrents, il suffit cependant amplement à mes besoins.
- Authelia : Authelia est un serveur d’authentification et d’autorisation open-source pouvant fournir une authentification à deux facteurs et du single sign-on (SSO) pour vos applications via un portail web.
- Lufi : Popularisé par Framadrop et par la suite les CHATONS et autres organisations défendant entre autre le logiciel libre, il permet de partager des fichiers de manière simple et sécurisée. À noter que Lufi propose une intégration avec un annuaire LDAP. Donc si vous n'avez pas besoin de SSO, vous pouvez utiliser Lufi tel quel sans passer par Authelia.
- Nginx comme reverse-proxy.
- Docker pour faire fonctionner LLDAP et Authelia.
- Certbot avec challenge DNS
Voici le schéma de principe simplifié :
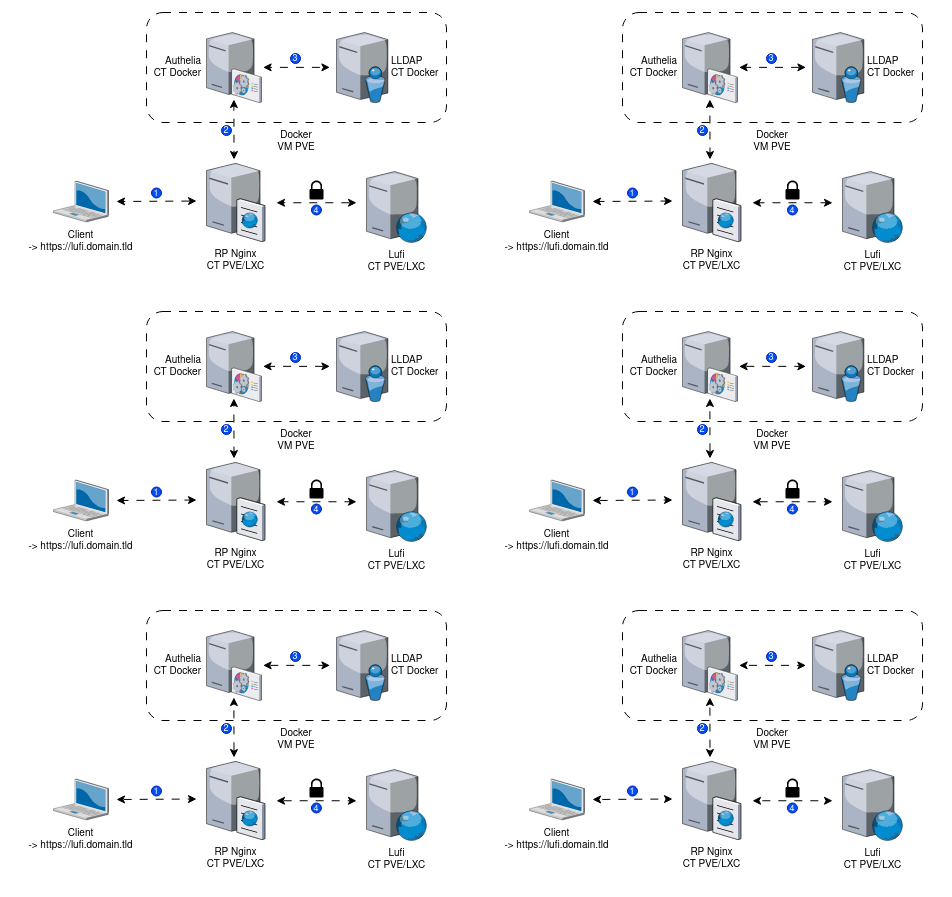
- Des noms de domaine de portée globale.
- Ubuntu 22.04 pour faire tourner la partie serveur / Conteneurs LXC et VM sur Proxmox VE 8.0.3.
- Pour Docker, j'ai créé un utilisateur dédié au lancement des conteneurs.
- Authy sur smartphone pour la double authentification avec mot de passe à usage unique.
Arborescence finale détaillée :
/srv/lldap/
├── container-vars.env
├── data
│   ├── lldap_config.toml
│   ├── private_key
│   ├── ssl
│   │   ├── certfile.crt
│   │   └── keyfile.key
│   └── users.db
├── docker-compose.yml
└── secrets
    ├── JWT_SECRET
    └── LDAP_USER_PAS
Création des fichiers et des dossiers :
mkdir /srv/lldap/
cd /srv/lldap/

## Génération du jeton JWT_SECRET
tr -cd '[:alnum:]' < /dev/urandom | fold -w "64" | head -n 1 > ./secrets/JWT_SECRET

## Génération du mot de passe admin LDAP
tr -cd '[:alnum:]' < /dev/urandom | fold -w "20" | head -n 1 > ./secrets/LDAP_USER_PASS

## Génération du certificat et de la clé privée pour LDAPS
openssl req -x509 -sha256 -nodes -days 365 -newkey rsa:2048 -keyout ./data/ssl/keyfile.key -out ./data/ssl/certfile.crt

## Sécurisation des fichiers sensibles
chmod 600 ./secrets/*
chmod 600 ./data/ssl/*
Configuration de LLDAP :
vim ./data/lldap_config.toml :

database_url = "sqlite:///data/users.db?mode=rwc"
key_file = "/data/private_key"
Configuration des variables d'env :
vim container-vars.env :

LLDAP_LDAP_BASE_DN=dc=labo,dc=lan
TZ=Europe/Paris
UID=1001
GID=1001

# If using LDAPS, set enabled true and configure cert and key path
LLDAP_LDAPS_OPTIONS__ENABLED=true
LLDAP_LDAPS_OPTIONS__CERT_FILE=/data/ssl/certfile.crt
LLDAP_LDAPS_OPTIONS__KEY_FILE=/data/ssl/keyfile.key

# Secrets: lldap reads them from the specified files.
# This way, the secrets are not part of any process' environment.
LLDAP_JWT_SECRET_FILE=/secrets/JWT_SECRET
LLDAP_LDAP_USER_PASS_FILE=/secrets/LDAP_USER_PASS
Configuration du docker-compose.yml :
vim docker-compose.yml :

version: "3"

services:
  lldap:
    container_name: lldap
    image: nitnelave/lldap:stable
    ports:
      # For LDAP
      - "3890:3890"
      # For LDAPS (LDAP Over SSL), enable port if LLDAP_LDAPS_OPTIONS__ENABLED set true, look env below
      - "6360:6360"
      # For the web front-end
      - "17170:17170"
    volumes:
      - ./data:/data
      - ./secrets:/secrets
    env_file:
      - container-vars.env
    restart: unless-stopped
Lancez le conteneur puis connectez-vous à l'interface web de gestion http://ADRESSE-IP:17170/ (bien évidemment en prod, on mettra le chiffrement en place).
Le compte par défaut est admin et le mot de passe est contenu dans le fichier "/srv/lldap/secrets/LDAP_USER_PASS".
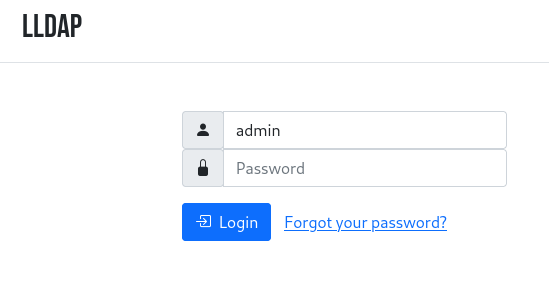
Vous pouvez créer/gérer les groupes et les utilisateurs.
Note : par défaut j'utilise une base Sqlite mais il est possible de migrer plus tard vers MySQL/MariaDB ou PostgreSQL https://github.com/lldap/lldap/blob/main/docs/database_migration.md
Optionnel mais très pratique, Redis permet de stocker les sessions Authelia. Ainsi en cas de redémarrage d'Authelia, cela n'oblige pas les utilisateurs à se ré-authentifier.
mkdir /srv/redis
cd /srv/redis

vim docker-compose.yml :

version: "3.9"
services:
  redis:
    container_name: redis
    hostname: redis
    image: redis:latest
    restart: unless-stopped
    ports:
      - "6379:6379"
    volumes:
- ./data:/dataArborescence finale détaillée :
/srv/authelia-lldap
.
├── config
│   ├── configuration.yml
│   └── db.sqlite3
├── container-vars.env
├── docker-compose.yml
└── secrets
    ├── AUTHENTICATION_BACKEND_LDAP_PASSWORD
    ├── JWT_SECRET
    ├── NOTIFIER_SMTP_PASSWORD
    ├── SESSION_SECRET
    └── STORAGE_ENCRYPTION_KEY
Configuration d'Authelia :
vim config/configuration.yml :

server:
  host: 0.0.0.0 # do not change this!
  port: 9091 # do not change this, this is Authelia internal port

log:
  level: info
  format: text
  file_path: /var/log/authelia/authelia.log

theme: light

totp:
  algorithm: sha1
  digits: 6
  period: 30
  skew: 1
  secret_size: 32

authentication_backend:
  password_reset:
    disable: false
  refresh_interval: 5m
  ldap:
    implementation: custom
    timeout: 5s
    start_tls: false
    username_attribute: uid
    additional_users_dn: ou=people
    users_filter: "(&({username_attribute}={input})(objectClass=person))"
    additional_groups_dn: ou=groups
    groups_filter: "(member={dn})"
    group_name_attribute: cn
    mail_attribute: mail
    display_name_attribute: displayName

access_control:
  default_policy: deny
  # On définit notre réseau interne si besoin
  networks:
  - name: internal
    networks:
      - 'X.X.X.X/X'
  # On définit les règles
  rules:
    # Règle #1 : si les accès à lufi.domain.tld se font depuis
    # depuis le réseau interne défini plus haut, une authentification simple suffit.
    - domain:
        - "lufi.domain.tld"
      policy: one_factor
      networks:
        - 'internal'
    # Règle #2 : si les accès à lufi.domain.tld se font depuis
    # depuis l'externe, une authentification 2FA est demandée.
    - domain:
        - "lufi.domain.tld"
      policy: two_factor

session:
  name: authelia_session
  expiration: 12h           # 12 hours
  inactivity: 45m           # 45 minutes
  remember_me_duration: 1M  # 1 month
  redis:
    host: IP_SERVEUR_REDIS
    port: 6379 # port for REDIS docker contianer
    database_index: 0 # change this if you already use REDIS for something

regulation:
  max_retries: 3
  find_time: 5m
  ban_time: 15m

storage:
  # Il est possible d'utiliser d'autres back-end comme MariaDB ou PGSQL.
  local:
    path: /config/db.sqlite3
Configuration des variables d'environnements :
vim container-vars :

PUID=1001
PGID=1001
AUTHELIA_SESSION_DOMAIN=domain.tld
AUTHELIA_TOTP_ISSUER=authelia.domain.tld
AUTHELIA_WEBAUTHN_DISPLAY_NAME=authelia
AUTHELIA_NOTIFIER_SMTP_HOST=SERVEUR_MAIL
AUTHELIA_NOTIFIER_SMTP_PORT=587
AUTHELIA_NOTIFIER_SMTP_USERNAME=username
AUTHELIA_NOTIFIER_SMTP_SENDER="Authelia <user@mail>"
AUTHELIA_AUTHENTICATION_BACKEND_LDAP_URL=ldap://IP_SERVEUR_LLDAP:3890
AUTHELIA_AUTHENTICATION_BACKEND_LDAP_BASE_DN=dc=labo,dc=lan
AUTHELIA_AUTHENTICATION_BACKEND_LDAP_USER=uid=admin,ou=people,dc=labo,dc=lan

# Secrets: Authelia reads them from the specified files.
# This way, the secrets are not part of any process environment.
AUTHELIA_JWT_SECRET_FILE=/secrets/JWT_SECRET
AUTHELIA_SESSION_SECRET_FILE=/secrets/SESSION_SECRET
AUTHELIA_STORAGE_ENCRYPTION_KEY_FILE=/secrets/STORAGE_ENCRYPTION_KEY
AUTHELIA_NOTIFIER_SMTP_PASSWORD_FILE=/secrets/NOTIFIER_SMTP_PASSWORD
AUTHELIA_AUTHENTICATION_BACKEND_LDAP_PASSWORD_FILE=/secrets/AUTHENTICATION_BACKEND_LDAP_PASSWORD
Renseignement des secrets :
tr -cd '[:alnum:]' < /dev/urandom | fold -w "64" | head -n 1 > ./secrets/JWT_SECRET
tr -cd '[:alnum:]' < /dev/urandom | fold -w "64" | head -n 1 > ./secrets/SESSION_SECRET
tr -cd '[:alnum:]' < /dev/urandom | fold -w "64" | head -n 1 > ./secrets/STORAGE_ENCRYPTION_KEY
Renseignez ensuite les fichiers :
- "./secrets/NOTIFIER_SMTP_PASSWORD"
- "./secrets/AUTHENTICATION_BACKEND_LDAP_PASSWORD"
On modifie les droits sur les fichiers contenu le répertoire secrets :
chmod 600 secrets/*docker-compose.yml :
version: "3.5"

services:
  authelia:
    image: authelia/authelia
    network_mode: "bridge"
    container_name: authelia
    ports:
      - "9091:9091"
    env_file:
      - container-vars.env
    volumes:
      - "./config:/config"
      - "./secrets:/secrets"
      - "./log:/var/log/authelia"
    environment:
      - TZ=Europe/Paris
    restart: unless-stopped
Vous pouvez lancer le conteneur et consulter les logs pour vérifier si le lancement a bien été effectué.
# /etc/nginx/sites-enabled/001-authelia.domain.tld

server {
    server_name authelia.domain.tld;
    listen 80;
    return 301 https://$server_name$request_uri;
}

server {
    server_name authelia.domain.tld;
    listen 443 ssl http2;

    # Other SSL stuff goes here
    ssl_certificate /etc/letsencrypt/live/authelia.domain.tld/fullchain.pem;
    ssl_certificate_key /etc/letsencrypt/live/authelia.domain.tld/privkey.pem;
    include /etc/letsencrypt/options-ssl-nginx.conf;
    ssl_dhparam /etc/letsencrypt/ssl-dhparams.pem;

    access_log      /var/log/nginx/authelia.access.log;
    error_log       /var/log/nginx/authelia.error.log;

    set $upstream_authelia http://IP_SERVEUR_AUTHELIA:9091;

    location / {
        include /etc/nginx/snippets/proxy.conf;
        proxy_pass $upstream_authelia;
    }

    location /api/verify {
        proxy_pass $upstream_authelia;
    }
}Source : https://www.authelia.com/integration/proxies/nginx/
Ils nous serviront pour Authelia et pour les applications web :
- proxy.conf
- authelia-authrequest.conf
- authelia-location.conf
proxy.conf
# /etc/nginx/snippets/proxy.conf

## Headers
proxy_set_header Host $host;
proxy_set_header X-Original-URL $scheme://$http_host$request_uri;
proxy_set_header X-Forwarded-Proto $scheme;
proxy_set_header X-Forwarded-Host $http_host;
proxy_set_header X-Forwarded-Uri $request_uri;
proxy_set_header X-Forwarded-Ssl on;
proxy_set_header X-Forwarded-For $remote_addr;
proxy_set_header X-Real-IP $remote_addr;
proxy_set_header Connection "";

## Basic Proxy Configuration
client_body_buffer_size 128k;
proxy_next_upstream error timeout invalid_header http_500 http_502 http_503; ## Timeout if the real server is dead.
proxy_redirect  http://  $scheme://;
proxy_http_version 1.1;
proxy_cache_bypass $cookie_session;
proxy_no_cache $cookie_session;
proxy_buffers 64 256k;

## Trusted Proxies Configuration
## Please read the following documentation before configuring this:
##     https://www.authelia.com/integration/proxies/nginx/#trusted-proxies
#set_real_ip_from 10.0.0.0/8;
#set_real_ip_from 172.16.0.0/12;
#set_real_ip_from 192.168.0.0/16;
#set_real_ip_from fc00::/7;
real_ip_header X-Forwarded-For;
real_ip_recursive on;

## Advanced Proxy Configuration
send_timeout 5m;
proxy_read_timeout 360;
proxy_send_timeout 360;
proxy_connect_timeout 360;
authelia-location.conf
# /etc/nginx/snippets/authelia-location.conf

set $upstream_authelia http://IP_SERVEUR_AUTHELIA:9091/api/verify;

## Virtual endpoint created by nginx to forward auth requests.
location /authelia {
    ## Essential Proxy Configuration
    internal;
    proxy_pass $upstream_authelia;

    ## Headers
    ## The headers starting with X-* are required.
    proxy_set_header X-Original-URL $scheme://$http_host$request_uri;
    proxy_set_header X-Original-Method $request_method;
    proxy_set_header X-Forwarded-Method $request_method;
    proxy_set_header X-Forwarded-Proto $scheme;
    proxy_set_header X-Forwarded-Host $http_host;
    proxy_set_header X-Forwarded-Uri $request_uri;
    proxy_set_header X-Forwarded-For $remote_addr;
    proxy_set_header Content-Length "";
    proxy_set_header Connection "";

    ## Basic Proxy Configuration
    proxy_pass_request_body off;
    proxy_next_upstream error timeout invalid_header http_500 http_502 http_503; # Timeout if the real server is dead
    proxy_redirect http:// $scheme://;
    proxy_http_version 1.1;
    proxy_cache_bypass $cookie_session;
    proxy_no_cache $cookie_session;
    proxy_buffers 4 32k;
    client_body_buffer_size 128k;

    ## Advanced Proxy Configuration
    send_timeout 5m;
    proxy_read_timeout 240;
    proxy_send_timeout 240;
    proxy_connect_timeout 240;
}
authelia-authrequest.conf
# /etc/nginx/snippets/authelia-authrequest.conf

## Send a subrequest to Authelia to verify if the user is authenticated and has permission to access the resource.
auth_request /authelia;

## Set the $target_url variable based on the original request.

## Comment this line if you're using nginx without the http_set_misc module.
#set_escape_uri $target_url $scheme://$http_host$request_uri;

## Uncomment this line if you're using NGINX without the http_set_misc module.
set $target_url $scheme://$http_host$request_uri;

## Save the upstream response headers from Authelia to variables.
auth_request_set $user $upstream_http_remote_user;
auth_request_set $groups $upstream_http_remote_groups;
auth_request_set $name $upstream_http_remote_name;
auth_request_set $email $upstream_http_remote_email;

## Inject the response headers from the variables into the request made to the backend.
proxy_set_header Remote-User $user;
proxy_set_header Remote-Groups $groups;
proxy_set_header Remote-Name $name;
proxy_set_header Remote-Email $email;

## If the subreqest returns 200 pass to the backend, if the subrequest returns 401 redirect to the portal.
error_page 401 =302 https://authelia.domain.tld/?rd=$target_url;
Testez votre configuration Nginx (nginx -t) et relancez le service. Si tout est OK vous pouvez alors tester l'authentification en vous rendant sur https://authelia.domain.tld.
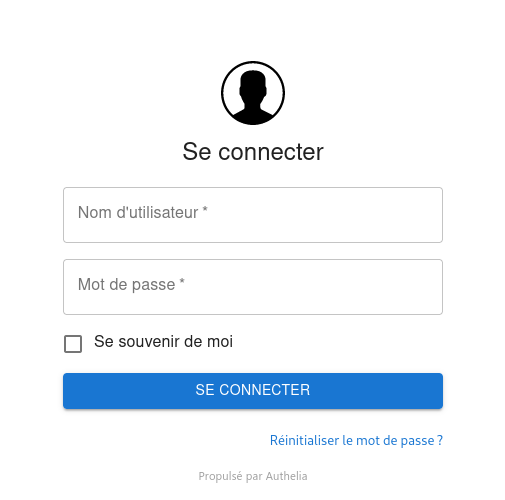
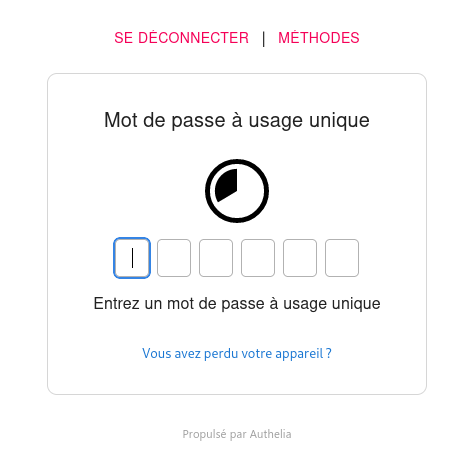
Une fois authentifié, Authelia vous demandera de choisir une méthode pour la deuxième authentification. J'ai choisi la méthode d'authentification par mot de passe à usage unique. Une fois le QR code scanné avec Authy sur mon smartphone, je peux saisir le code :
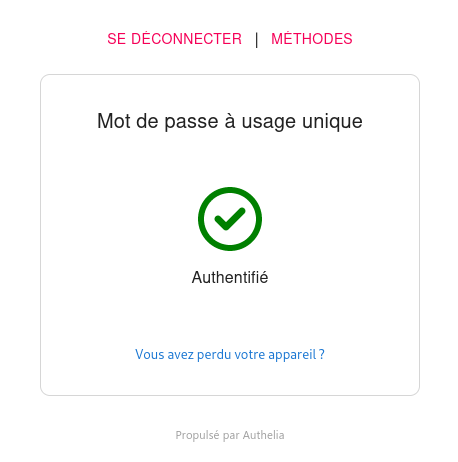
Authelia ne propose que le portail d'authentification vous indiquant uniquement le succès de l'authentification là où d'autres vous connectent sur une page d'accueil contenant par exemple les applications auxquelles vous avez accès.
Les utilisateurs souhaitant changer leur mot de passe, devront passer par https://authelia.domain.tld/reset-password/step1 (lien proposé sur la page d'authentification)
J'ai installé Lufi sur Ubuntu 22.04 et configuré Postfix en relais vers mon serveur de messagerie (apt install libsasl2-modules postfix).
Le wiki est suffisamment clair : https://framagit.org/fiat-tux/hat-softwares/lufi/-/wikis/home
apt-get install build-essential libssl-dev libio-socket-ssl-perl liblwp-protocol-https-perl zlib1g-dev libmariadbd-dev git
cpan Carton
cd /srv/
git clone https://framagit.org/fiat-tux/hat-softwares/lufi.git
cd lufi/
carton install --deployment  --without=test --without=mysql --without=postgresql --without=ldap --without=htpasswd --without=swift-storage
cp lufi.conf.template lufi.conf
vim lufi.conf
cp utilities/lufi.service /etc/systemd/system/
systemctl daemon-reload
systemctl enable lufi
systemctl start lufi.serviceLe fichier de configuration de Lufi :
{
    hypnotoad => {
        listen => ['http://0.0.0.0:8080'],
        proxy  => 1,
        workers => 30,
        clients => 1,
    },
    contact       => '<a href="https://home.domain.tld">Contact page</a>',
    report => 'user@mail',
    secrets        => ['qzpokihsdjoihrqsdqsqsei'],
    instance_name => 'Mes fichiers',
    allow_pwd_on_files => 1,
    mail => {
        from     => 'user@mail',
        encoding => 'base64',
        type     => 'text/html',
        how      => 'sendmail',
        howargs  => [ '/usr/sbin/sendmail -t' ],
    },
    mail_sender => 'user@mail',
    disable_mail_sending => 0,
    dbtype => 'sqlite',
    db_path => 'lufi.db',
};Rappel du principe : seules les personnes authentifiées peuvent partager des fichiers sur Lufi et n'importe qui peut récupérer les fichiers du moment qu'ils ont le lien adéquate.
# /etc/nginx/sites-enabled/002-lufi.domain.tld

server {
    # SSL and VHost configuration
    listen 443 ssl http2;
    server_name             lufi.domain.tld;

    ssl_certificate /etc/letsencrypt/live/lufi.domain.tld/fullchain.pem;
    ssl_certificate_key /etc/letsencrypt/live/lufi.domain.tld/privkey.pem;
    include /etc/letsencrypt/options-ssl-nginx.conf;
    ssl_dhparam /etc/letsencrypt/ssl-dhparams.pem;

    access_log      /var/log/nginx/lufi.access.log;
    error_log       /var/log/nginx/lufi.error.log;

    # Authelia
    include snippets/authelia-location.conf;

    location /r {
        proxy_pass http://IP_SERVEUR_LUFI:8080;
        # Really important! Lufi uses WebSocket, it won't work without this
        proxy_set_header Upgrade $http_upgrade;
        proxy_set_header Connection "upgrade";

        proxy_http_version 1.1;
        proxy_set_header Host $host;
        proxy_set_header X-Real-IP $remote_addr;
        proxy_set_header X-Forwarded-For $proxy_add_x_forwarded_for;

        # If you want to log the remote port of the file senders, you'll need that
        proxy_set_header X-Remote-Port $remote_port;

        proxy_set_header X-Forwarded-Proto $scheme;

        # We expect the downstream servers to redirect to the right hostname, so don't do any rewrites here.
        proxy_redirect     off;

     }

     location /partial {
        proxy_pass http://IP_SERVEUR_LUFI:8080;
        # Really important! Lufi uses WebSocket, it won't work without this
        proxy_set_header Upgrade $http_upgrade;
        proxy_set_header Connection "upgrade";

        proxy_http_version 1.1;
        proxy_set_header Host $host;
        proxy_set_header X-Real-IP $remote_addr;
        proxy_set_header X-Forwarded-For $proxy_add_x_forwarded_for;

        # If you want to log the remote port of the file senders, you'll need that
        proxy_set_header X-Remote-Port $remote_port;

        proxy_set_header X-Forwarded-Proto $scheme;

        # We expect the downstream servers to redirect to the right hostname, so don't do any rewrites here.
        proxy_redirect     off;
        }

    location /download {
        proxy_pass http://IP_SERVEUR_LUFI:8080;
        # Really important! Lufi uses WebSocket, it won't work without this
        proxy_set_header Upgrade $http_upgrade;
        proxy_set_header Connection "upgrade";

        proxy_http_version 1.1;
        proxy_set_header Host $host;
        proxy_set_header X-Real-IP $remote_addr;
        proxy_set_header X-Forwarded-For $proxy_add_x_forwarded_for;

        # If you want to log the remote port of the file senders, you'll need that
        proxy_set_header X-Remote-Port $remote_port;

        proxy_set_header X-Forwarded-Proto $scheme;

        # We expect the downstream servers to redirect to the right hostname, so don't do any rewrites here.
        proxy_redirect     off;
        }

    location ~* ^/(img|css|font|js)/ {
        proxy_pass http://IP_SERVEUR_LUFI:8080;
        proxy_set_header Host      $host;
        proxy_http_version 1.1;
        add_header Expires "Thu, 31 Dec 2037 23:55:55 GMT";
        add_header Cache-Control "public, max-age=315360000";
    }

    location / {
        # Adapt this to your configuration (port, subdirectory (see below))
        proxy_pass  http://IP_SERVEUR_LUFI:8080;

        # Really important! Lufi uses WebSocket, it won't work without this
        proxy_set_header Upgrade $http_upgrade;
        proxy_set_header Connection "upgrade";

        # Authelia
        include /etc/nginx/snippets/proxy.conf;
        include /etc/nginx/snippets/authelia-authrequest.conf;
    }
}
Testez votre configuration et relancez Nginx.
Dorénavant quand vous souhaitez vous connecter à Lufi, Authelia vous demandera :
- une authentification simple si vous y accédez depuis votre réseau interne,
- une double authentification si vous y accédez depuis un réseau externe.
Une fois authentifié, vous pourrez déposer des fichiers et les liens générés seront quant à eux accessibles sans authentification.
Le couple Authelia/LLDAP est parfait pour des environnements aux ressources limitées avec une empreinte mémoire très légère (16 Mo pour LLDAP et 22 Mo pour Authelia constatés sur mon serveur). On trouvera cependant moins de fonctionnalités que leurs concurrents mais l'essentiel est là. Autelia permet notamment une gestion très fine des accès en jouant par exemple avec les groupes d'utilisateurs et peut s'appuyer sur d'autres back-end d'authentification.
Dans le prochain billet, j'intégrerai Nextcloud et mettrai en place OpenID Connect (oidc).
Sources :
- https://helgeklein.com/blog/authentication-sso-user-management-password-reset-for-home-networks/
- https://www.authelia.com/integration/proxies/nginx/
- https://www.authelia.com/configuration/methods/secrets/
- https://matwick.ca/authelia-nginx-sso/
- https://github.com/lldap/lldap
- https://wiki.parinux.org/si/lufi